Monday, November 14, 2011

"Hare Trigger" step by step 3

Hi Everyone,

I just returned from my Greenhouse Gallery 4 person show. It was a great time and I got to meet Mark Smith and Jim Janes, the gallery owner/operators, as well as the whole staff. We were treated like royalty and for that Ann an I are so grateful. Also, I got to meet, and hang out with two of the three artists who showed with me, Gregory Packard and Andre Kohn. In some ways we couldn't be more different, but in most ways we are fraternity brothers who share so many experiences in life. More on that in another post. We also had the pleasure of meeting many collectors, some of them who have collected my paintings in the past. It's always like meeting friends or even family, when you get to meet people who cared enough about one of your paintings, to take it home. Not to mention the collectors who care enough to put your show on their Friday nite schedule and come out to meet you. Thanks to everyone who took the time to come out, not only for the Friday night reception, but also for my Saturday morning demo. It was my first one at Greenhouse and I hope not the last. There were some awesome people in the audience who asked some very good questions that made me think. When I get the chance, I will be putting up photos in the next week....

.....In the mean time, here is the latest step in the progress of Hare Trigger.

Hare Trigger, 60X40", step 3

The lay-in continues, as well as the comparing of values. To bring the front legs forward on the horse, I keep them darker than the back legs. Those back legs will be covered in dust in the final painting, but it's important to knock them back visually now. Get it as close as you can now, even if you know you will be covering over it later. Since I knew I would be out of town during the lay in stage, I knew I would be working a dry painting at times. When that happens, and I'm ready to start on the dry painting, I will lay it on the ground and give it a good liberal coat of liquin painting medium. This enables me to work on a painting that has the look and feel if wet into wet. It's not the way I prefer to work, as I would much rather work wet into wet straight away, but that's not always possible, particularly when it's a big painting. So with the background sky now blocked in, I lay in the rest of the horse and a good portion of it's saddle. Some of the tack is also added, such as the reins, cinches and stirrup. Along the horse's belly, I've added some greenish reflected light from the cactus below it. It may look a bit odd now, but when I've added in the ground and prickly pear, it will look right. That light is bouncing around, you need to marry together objects by making sure their reflections are there effecting each other.

Tuesday, November 8, 2011

"Hare Trigger" step by step 2

So, as you can see, I've jumped right in on the cowboy's face, then shirt, hat and finally I've roughed in some of the sky, just to make sure my relationships are right. I'll keep beating the "Don't get caught up in the details" drum. This painting will change considerably as I work on it.

Working down the canvas, I continue to lay in the chaps, jeans and glove. Then it's on to the body of the horse. I will work along areas that touch each other, rather than jumping from the cowboy's face to the rabbit or prickly pear. It's easier to judge values when you have objects next to one another than trying to guess how they'll line up once they do come together. I try to make it as easy on myself as possible. Also, I'm working on the clouds and sky in the background. It's easier to work the edges of the cowboy and horse into the background when everything is wet, rather than coming back to them later when they are dry. I tend to keep my edges soft at this point, knowing that #1) it looks more natural that way, and #2) it's going to be a painting that has a lot of dust in it and that demands softer edges.

Monday, November 7, 2011

New Step by Step of painting "Hare Trigger"


Hi Everybody,

Yeah, I know, it's been forever since I've posted. I'm sorry about that. I've spent the Summer doing paintings for the Greenhouse 4 person show, "Through the Artist's Eyes". It opens on November 8, 2011, and runs through the month of November. I'm done with the paintings now and they are at the gallery. So....now I've started working on my largest painting so far, a 60X40" I'm calling "Hare Trigger. It's one I've been preparing to do for a while and I was excited to finally put paint to canvas. I've been collecting my reference, taking photo reference and doing sketches, refining the design and composition. In this blog, I will be taking you step by step, day by day to the painting's finish. The only break I'll be taking is for the show opening coming up. But I hope you'll hardly notice. As I work it, I'll post it. I hope this will be a help to you artists just starting out, and help to take some of the mystery away for you collectors. There's nothing mystical about what we artists do. It's very logical.

To start, let me share with you my sketch, and the reference I've taken and used to assemble this painting.


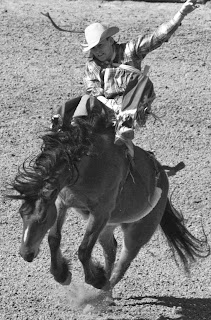
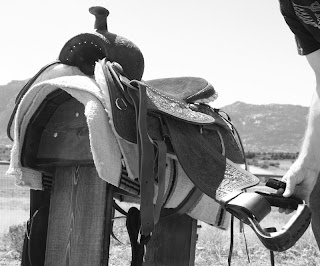
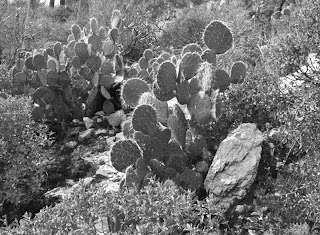
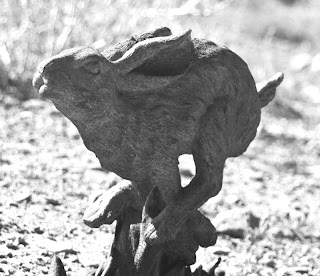
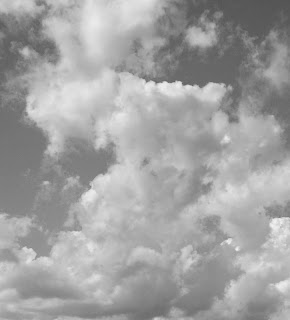
These sketches are for information/design use only.... The whole idea is to get the compositional elements in place and work out all the problems such as focal point. I don't spend a lot of time on these and don't think of them as precious in any way, they're just a tool. Right now things are fluid and I don't want to be locked in along the way, and doing finished drawings are a good way to fall into that trap. I want just enough information to get things onto the canvas in the area they need to be. Here are the reference photos I took in preparation to assemble the concept. Again, nothing fancy, but it's imperative that the light source is consistent. For this painting I needed the horse/rider, the bronc rider is from a rodeo and doesn't have the right kind of saddle, so I had to add that to the horse. I used one of my saddles and took lots of photos of it in different positions (things like the stirrups and the fender). From that photo shoot I selected the one that was right for the horse and rider photo I had. Next, I needed prickly pear cactus reference, which is easy enough around here. The next is the running rabbit. Since I knew I was going to be painting this, I kept my eyes open for good reference. I was open to inventing the rabbit, but knew that it would be more successful if I had reference. Luckily, I was in a local shop and discovered a statue of a rabbit running, in just the pose I wanted. I don't get lucky often, but once in a while.... so, I photographed the statue in the postion I needed it to be in. The final reference is a cloud shot I had in my reference morgue. I'm showing everything in black and white because the colors don't matter now, just the values (lights and darks). It's all about simplicity and structure in this stage. Colors can be deceptive, but values don't lie.

________________________________

________________________________

________________________________

________________________________

________________________________
finished sketch


So now, once this prep work is done, it's time to transfer the drawing onto the canvas. I grid the drawing, scale it up, and draw it onto the canvas. Now it's time to start painting.... finally! But remember, it doesn't do any good to short yourself on this prep work. It's as important, if not more so, than the painting part. The more problems you solve on the front end of the project, the easier it will go when you get to painting. Then you can concentrate on applying the paint, not on having to move things around. This is a large painting and I'll have my hands full of other problems as I go along, but not composition problems.

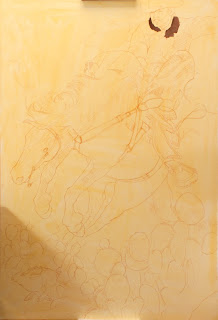
Here it is on the canvas. No heavy duty details, just an simple drawing with everything in place. The shadow you see on the lower left side of the canvas is from my painting table (I'm a lefty), and the shadow on the top of the canvas is from the canvas holder attached to my easel. I work on a Hughes Easel, which makes working on a larger canvas a breeze. I can move around the canvas with the touch of a finger. Up and down, or side to side, it doesn't matter, it's easy to work the entire canvas on this easel. As you can see, I started applying the paint around the face area. If I'm going to have a problem with an area, this is probably going to be it, so I'd rather know it early on when I'm still fresh and eager.

Well, that's enough for the first day back to blogging. Thanks for taking the time to follow me and I hope this will take some of the mystery out of the artist's studio. If you have questions as I go along, don't be shy. I'll try to cover everything I can think of, but you know how it is.

Happy Painting, Steve