Hi Everybody,
Time to move onto the dogs and main figure. I don't always wait till the end to do the main figure, but it just naturally flowed that way on this painting. The rest of the figures will have everything to do with how I paint the cowboy. Painting the others first will keep me from painting him too tightly. Yep, you can probably see a theme developing here, with me always talking about keeping it loose. That's because my tendency is to go directly into painting the details and getting lost in the weeds. By keeping it loose and waiting till the end to selectively add the details, I'm able to make adjustments and paint a more artistic picture. One that focuses your eye to the exact spot on which I wish it to land.
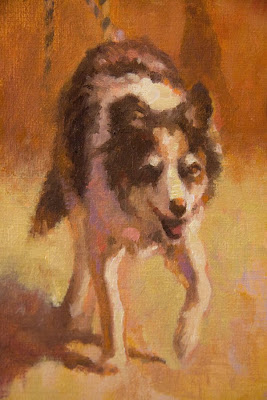 First Dog laid in. Not the perfect face or head, but close enough for now. I will come back and tweak it later, but all the info is there and I can move on to the next dog.
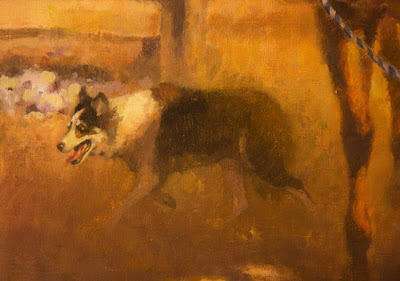 Second border collie laid in. It was very important to me that the back of it's body was obscured by a veil if drifting dust. Right now it's purely about getting to dog to sit back and be one of the last figures you see.
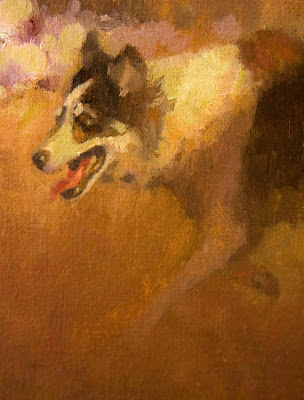 I'm happier with this guy's face and I won't have to do much fiddling with it. Once you get it right leave it alone. Remember, there ain't no undo button like there is on the computer. I've lost more good painting by messing with a passage than anything else. If it's right, leave it alone!
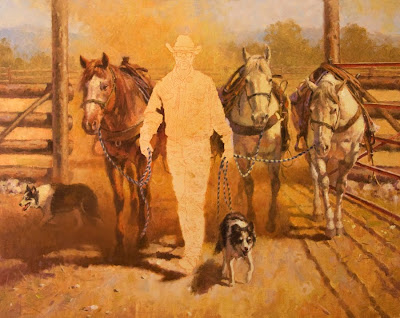 Here it is with the dogs in place. I still have a couple of hours, so I go ahead and start on the head of the cowboy.
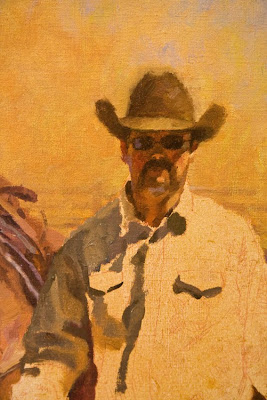 Keep your shadow areas separate from your light areas. Remember to add your reflected light, but don't let it compete with the light side. You'll notice that I began to put in the shirt, but I keep the lay in in the shadows, always comparing this shadow value to the surrounding areas, like the face and the horse which borders his sleeve.
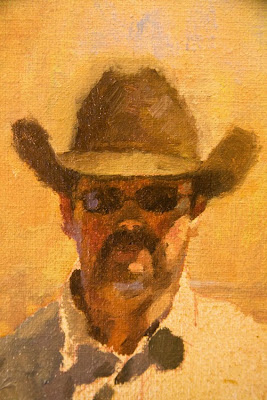 Here's a close up detail of the face. Nothing is labored over. Be clean in your value changes and remember that the reflected light which is bouncing off the underside of his chin is a version of what is causing it, in this case, his light purple/ blue shirt. It might look a bit funny now, but will be right when I paint in the light side of his shirt.
See you tomorrow!


3 comments:
Thank you for sharing! I am learning a lot from this demo, can't wait to see more ;O)
What a treat! I haven't checked in on you in a while and WOW I'm really excited to see you doing a WIP. I'm surprised that you do such a detailed drawing ;-) for such a loose painting. That isn't being negative - I just didn't imagine that. I draw so detailed but never have more than a few outlines and shapes when I start and even on my pastels - I just have a really loose sketch but then I go tight on the finished painting. Go figure. How can I reverse that?? I want to learn how to loosen up - it's hard! Is it something you can learn or is it the way you think? What size brushes are you using on this one?
Thanks for the comments! I appreciate you taking the time to post.
Karen, I do like to do a tighter pencil. I'm sure it comes from my illustration work when I was airbrushing. Everything had to be worked out because I had to cut friskets for everything. The detailed drawing helps me to be more accurate in my looseness. But I can always refer back to it while I paint. A funny way to work, but hey, it works for me (usually, ha!)
If you really want to loosen up, start by giving yourself a fixed time to do a painting. One hour is a good place to start. DON'T CHEAT!! When your timer goes off, put down your brush. It's just like taking a test.... put down your pencils please! Don't worry if you didn't finish, you can always try again tomorrow. Eventually you will be comfortable with the quick decisions you have to make, trusting your choices. Plein air painting is also a great way to get better at painting looser. Rarely can you work on a painting, on location, longer than 2 hours. After that you have to move on, cause the light has.
My brushes and brush sizes vary. I start with 8-10's and eventually finish with softer synthetic whites. Start with a sledgehammer and end with tweezers. GOOD LUCK!!
Post a Comment