Hi Everybody,
Yeah, I know, it's been forever since I've posted. I'm sorry about that. I've spent the Summer doing paintings for the Greenhouse 4 person show, "Through the Artist's Eyes". It opens on November 8, 2011, and runs through the month of November. I'm done with the paintings now and they are at the gallery. So....now I've started working on my largest painting so far, a 60X40" I'm calling "Hare Trigger. It's one I've been preparing to do for a while and I was excited to finally put paint to canvas. I've been collecting my reference, taking photo reference and doing sketches, refining the design and composition. In this blog, I will be taking you step by step, day by day to the painting's finish. The only break I'll be taking is for the show opening coming up. But I hope you'll hardly notice. As I work it, I'll post it. I hope this will be a help to you artists just starting out, and help to take some of the mystery away for you collectors. There's nothing mystical about what we artists do. It's very logical.
To start, let me share with you my sketch, and the reference I've taken and used to assemble this painting.
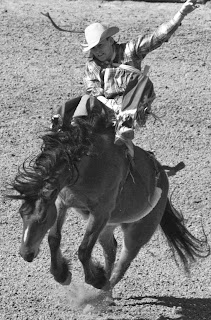
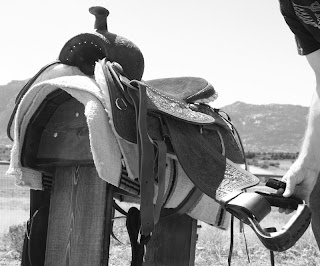
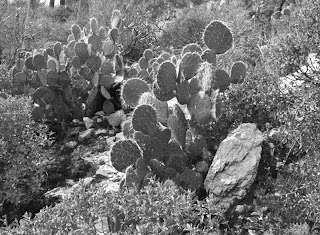
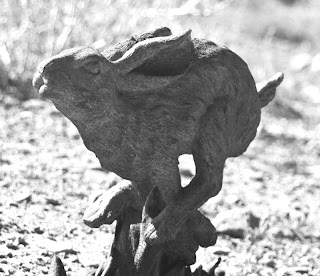
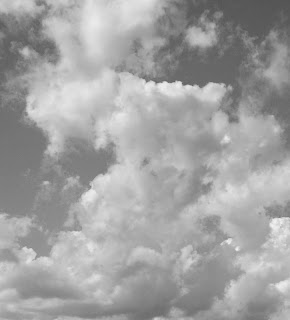
These sketches are for information/design use only.... The whole idea is to get the compositional elements in place and work out all the problems such as focal point. I don't spend a lot of time on these and don't think of them as precious in any way, they're just a tool. Right now things are fluid and I don't want to be locked in along the way, and doing finished drawings are a good way to fall into that trap. I want just enough information to get things onto the canvas in the area they need to be. Here are the reference photos I took in preparation to assemble the concept. Again, nothing fancy, but it's imperative that the light source is consistent. For this painting I needed the horse/rider, the bronc rider is from a rodeo and doesn't have the right kind of saddle, so I had to add that to the horse. I used one of my saddles and took lots of photos of it in different positions (things like the stirrups and the fender). From that photo shoot I selected the one that was right for the horse and rider photo I had. Next, I needed prickly pear cactus reference, which is easy enough around here. The next is the running rabbit. Since I knew I was going to be painting this, I kept my eyes open for good reference. I was open to inventing the rabbit, but knew that it would be more successful if I had reference. Luckily, I was in a local shop and discovered a statue of a rabbit running, in just the pose I wanted. I don't get lucky often, but once in a while.... so, I photographed the statue in the postion I needed it to be in. The final reference is a cloud shot I had in my reference morgue. I'm showing everything in black and white because the colors don't matter now, just the values (lights and darks). It's all about simplicity and structure in this stage. Colors can be deceptive, but values don't lie.
 ________________________________
 ________________________________
 ________________________________
 ________________________________
So now, once this prep work is done, it's time to transfer the drawing onto the canvas. I grid the drawing, scale it up, and draw it onto the canvas. Now it's time to start painting.... finally! But remember, it doesn't do any good to short yourself on this prep work. It's as important, if not more so, than the painting part. The more problems you solve on the front end of the project, the easier it will go when you get to painting. Then you can concentrate on applying the paint, not on having to move things around. This is a large painting and I'll have my hands full of other problems as I go along, but not composition problems.
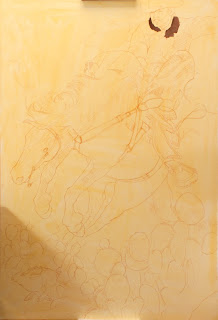 Here it is on the canvas. No heavy duty details, just an simple drawing with everything in place. The shadow you see on the lower left side of the canvas is from my painting table (I'm a lefty), and the shadow on the top of the canvas is from the canvas holder attached to my easel. I work on a Hughes Easel, which makes working on a larger canvas a breeze. I can move around the canvas with the touch of a finger. Up and down, or side to side, it doesn't matter, it's easy to work the entire canvas on this easel. As you can see, I started applying the paint around the face area. If I'm going to have a problem with an area, this is probably going to be it, so I'd rather know it early on when I'm still fresh and eager.
Well, that's enough for the first day back to blogging. Thanks for taking the time to follow me and I hope this will take some of the mystery out of the artist's studio. If you have questions as I go along, don't be shy. I'll try to cover everything I can think of, but you know how it is.
Happy Painting, Steve


6 comments:
Glad to see you are blogging again I found your blog earlier in the year and then you quit posting. I'll check out your work at the Greenhouse. I look forward to seeing it.
Hi Steve,
Great to see a new post and a post of a step by step demonstration makes it all the more special. I look forward to the progression from start to finish.
I do the same thing with some of mine and view as a slide show and even amaze myself how cool it looks.
Working on a canvas that big seems like a real challenge. However you have probably done even bigger paintings. I have not. Tim Fitz
I for one tend to rush into a painting too fast sometimes, just can't wait to get my brush to work... it works for me most of the time, but sometimes i get bogged down on larger paintings... think i will be taking some of your advice on my next large project...
Hi Douglas,
Yep, I just got busy and had to keep up with the show deadlines I had coming my way. I wish I could do it all, but sometimes somethin's gotta give. Glad you came back and posted too.
Hey Tim, this is the biggest canvas I've attempted to date, but really nothing changes but the scale. I'm starting to put more action in my work and it seems to lend itself to bigger and bigger canvases. Don't hesitate to try one, I know you can handle it for sure!
Graham,
I know where you're coming from in wanting to jump right in, and in the smaller pieces it works just fine. But on bigger paintings, say anything from 24X30 on up, I slow down and work out problems with more than just a quick sketch. Often it's a matter of making sure I see the entire piece in my mind without too many holes. If there's an area I'm not sure how it's gonna work, I figure it out or there'll be hell to pay later, at least for me. So, whether it's a drawing or a color study, I take my time in the beginning to keep from losing time later, and maybe in the process I make it easier on myself and increase the odds of success.
Post a Comment